I’m going to explain how the menu system I’m making works and all the work I’m doing because the way that Unreal Engine’s UMG interface system works with controllers by default is such a massive headache I’d rather just do it myself.
The problem I have is that when the engine is set to input mode “Game and UI” the mouse cursor is always active even if you make it invisible. And if it’s positioned over a button that means the button will go into its hovered state, and if the mouse is clicked the button will be activated. This game is meant to be controller only and I just want to not use the mouse at all. In addition to that other problem, there was a possibility if you alt-tabbled during a menu that the game would lose track of which button was supposed to be selected and the game would essentially be soft-locked unless you could move the invisible cursor to a button and click it.
So basically, I decided to make my own controller input system for the menus in blueprint. This way I can leave the input mode as “Game Only” so the mouse would be unable to mess things up and the game engine won’t do anything to the menus that I don’t know about. My idea for the design is somewhat inspired by the old Xbox 360 “Blade” interface. And I thought it looked cool if I put all the windows at a 30-degree angle. That makes layout kind of a pain but I’ll figure it all out before long. The system has a ton of parts that make it really modular, and the plan is to next change all of the menus in the game to use this instead of the default UMG focus system.
In Unreal, a PlayerController handles the input for a particular player. I decided the easiest way to do things was to make a new class of controller I called a MenuController to handle the inputs.
I also set up a GM_Salvage game mode to call all the menus and allow this to be moved to different maps if I want, but also to separate all that logic from the menu controller so it stays as “dumb” as possible for modularity’s sake.
The game mode passes controller inputs on to any menus that it needs to (although in this mode it’s just the one menu for now, I’ll add the pause menu later, including the ability to save and quit and resume later)
The interface is divided into several blades, and the menu has logic for navigating between blades and determining which one is active.
It also has a bunch of functions that are called when the menu is in specific states to show which buttons will do something at any given time, changing the labels and transparency as necessary.
Finally, the navigation logic passes to the active blade.
The blades each have their own layout and logic so they can be modular and I can potentially add more in the future. Everything is placeholders to be populated with the actual data at runtime.
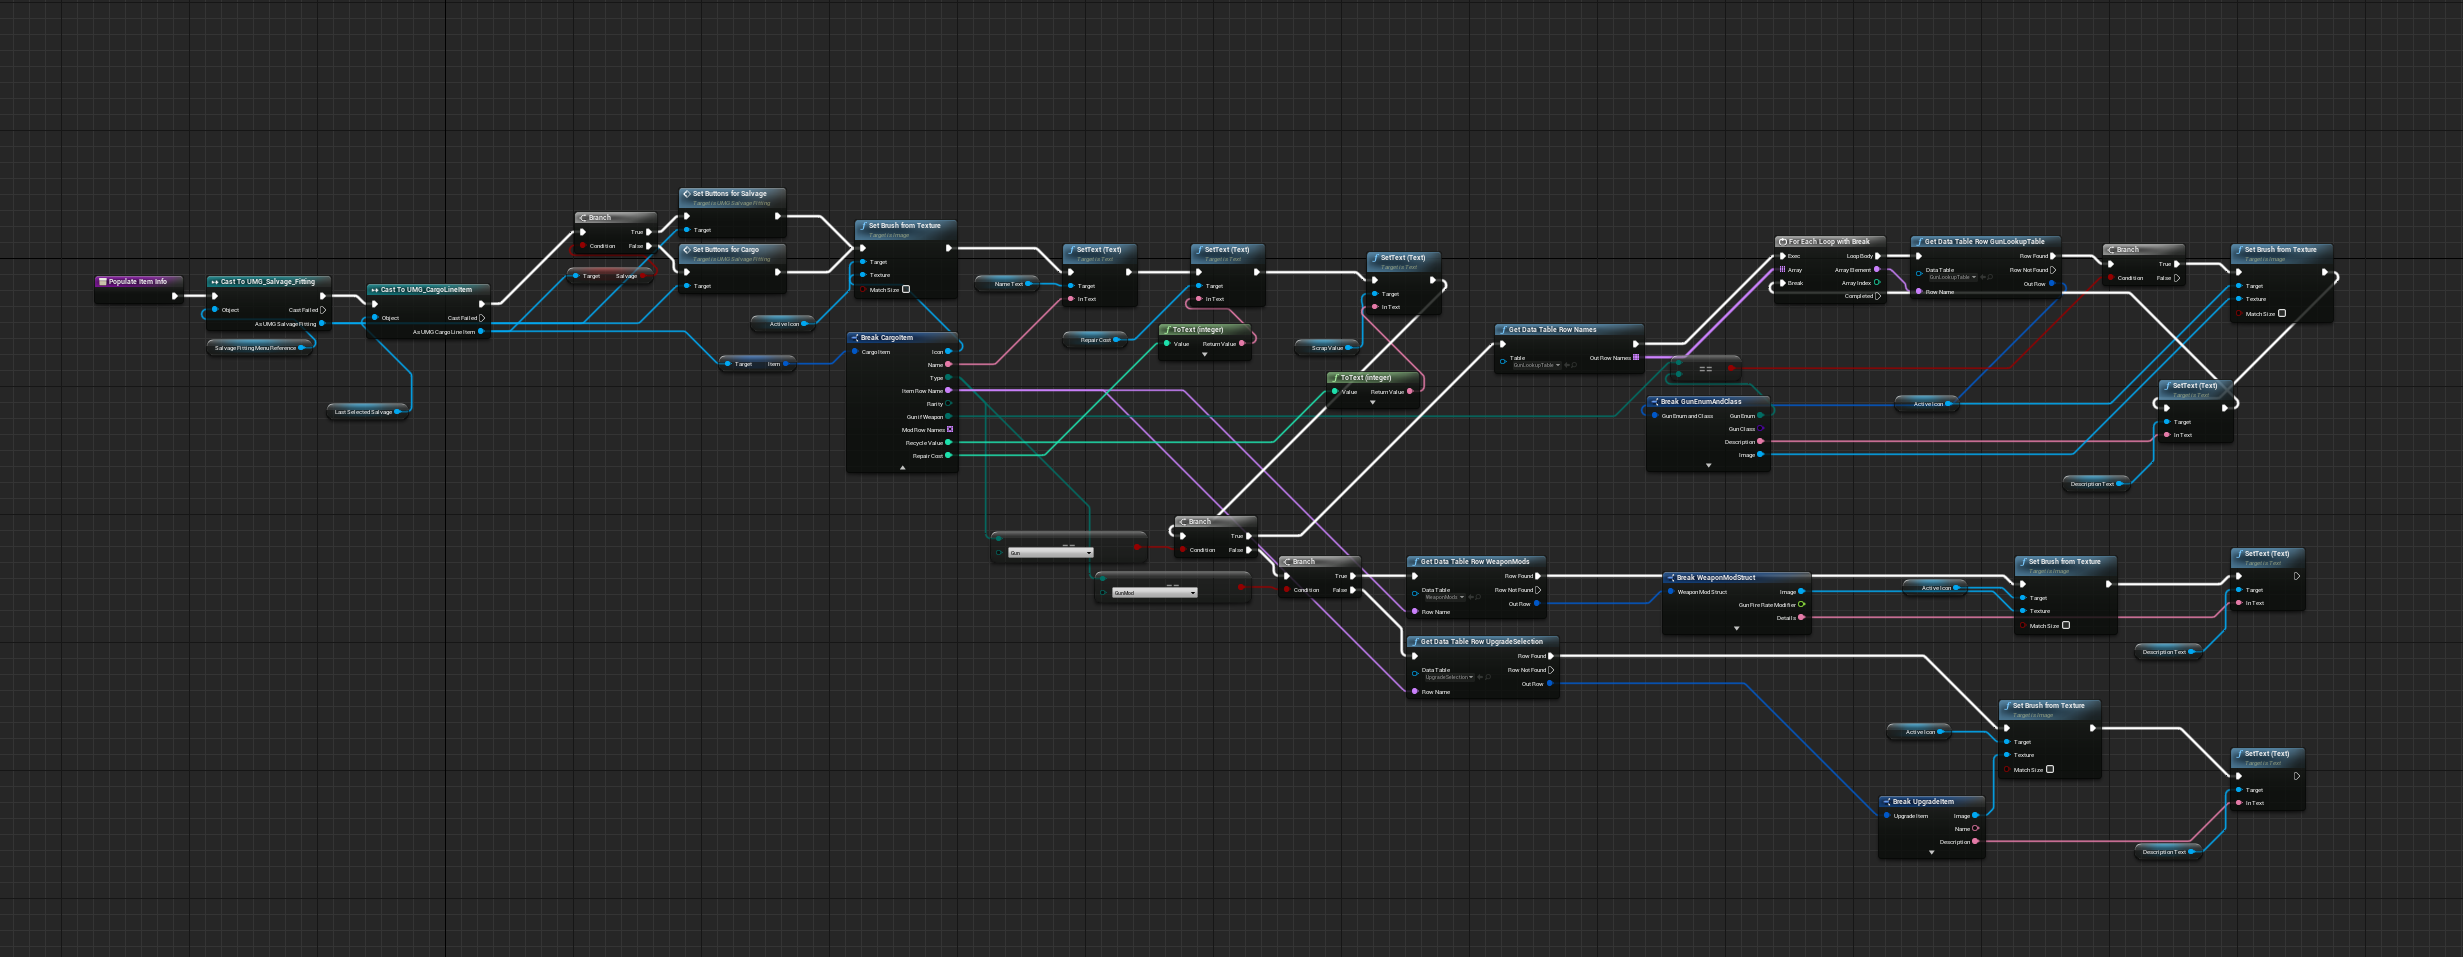
This is the function to pull the info from a selected item and show it in the information panel.
Here’s a summary of what I’ve talked about so far:
There are a few elements on that chart I haven’t detailed yet though.
One of these is the TransactionConfirmationDialog
This is stored on the main part of Salvage and Fitting menu. There are different methods to format it based on whatever kind of transaction is needed, and then generic “Accept and hide” as well as “Cancel and hide” methods for when it’s not needed. Several other controls use the flag that determines this window’s visibility to check if they are allowed to fire or not.
There are also the various tables, but they basically just populate themselves when instructed by the blades containing them.
The last major components are the line items themselves.
The actual functions aren’t that exciting, but the important part is that they contain functions for showing themselves as either selected or not selected, as well as information as to the item they are referencing and where it is either stored or installed.
I have used the term ‘populate’ a lot. I use that term to mean when a particular piece of UI looks up specific information or assets and changes its appearance or contents to reflect that data. This is an example of one of the populate functions, from the ModdedWeaponLineItem
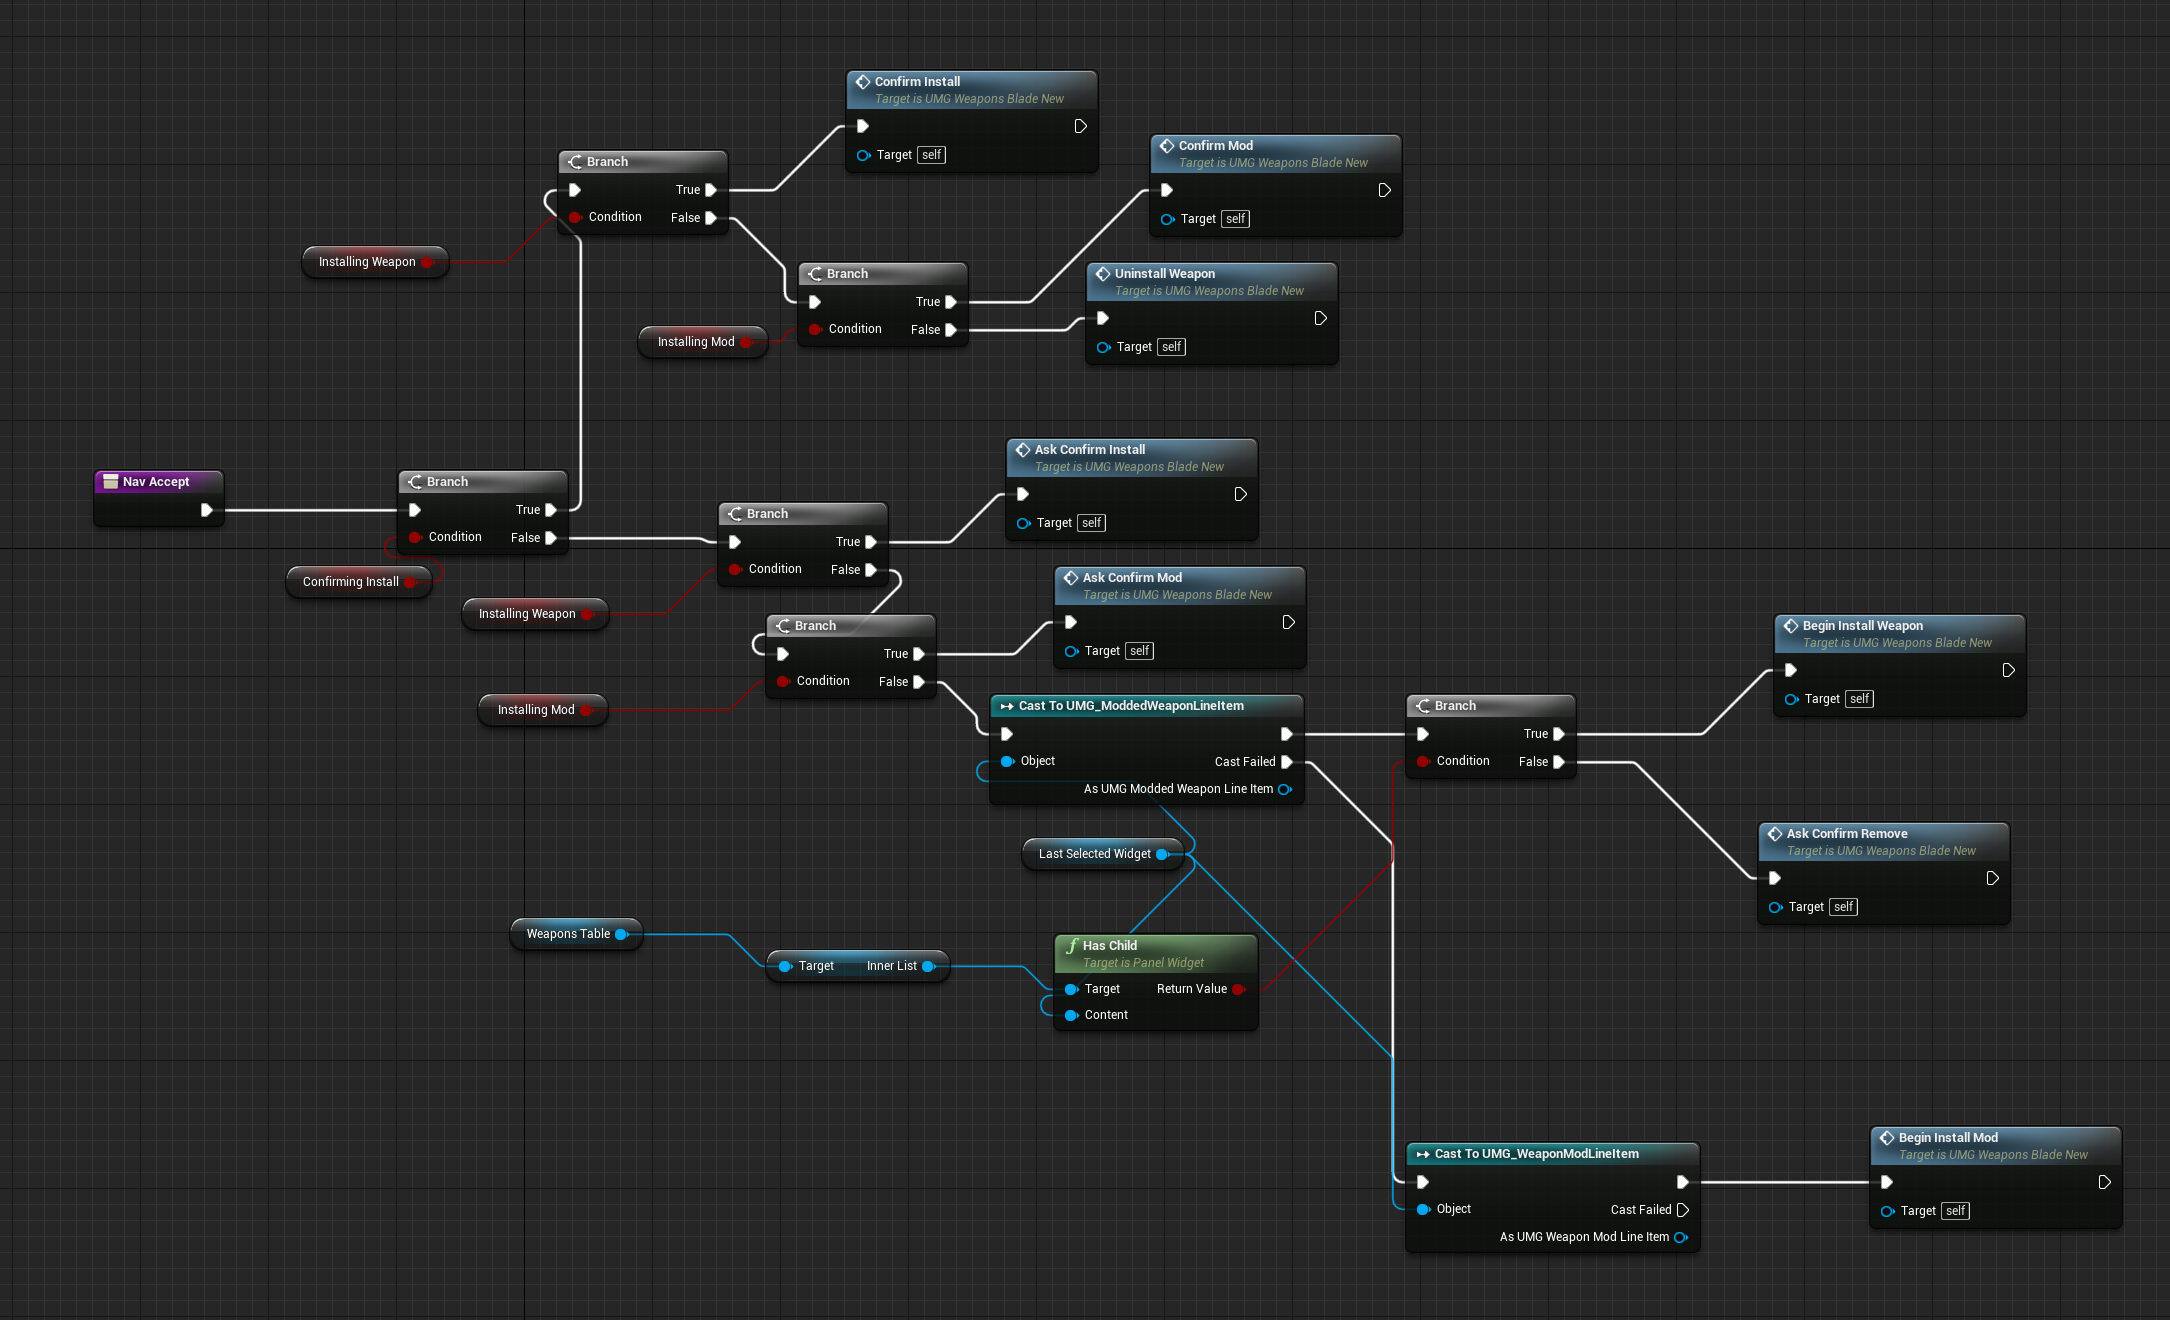
So, after passing the navigation command from the controller to the game mode to the menu to the active blade, there is something like this
The blade knows what state the menu is in, and knows what particular subset of items are eligible to be selected at any time. If the item is in some sort of scroll area, it makes sure to scroll it to the middle, then calls a command that iterates over all the items and tells them to show themselves as either selected or not.
There is a similar process for handling when other buttons are pressed. For example, there is a chain of “accept” functions that set the menus into different states to initiate the various transactions like installing and modifying weapons
There are functions calling back to the main part of the menu to bring up the transaction confirmation window when appropriate, as well as to update the buttons being displayed to show the ones relevant to the current state of the menu.
Finally, the blades do all the work of whatever transaction they are being told to. For example, this is the function to uninstall a weapon from the ship.
In this transaction, the blade uses the game state and the selected item to fetch all the required information about a weapon to create a cargo item that has all the necessary data to recreate the weapon if it’s later re-installed on the ship. It then creates that data structure and stores it in the player cargo section of the game instance. Next, it uses the information stored in the line item to find the specific equipped weapon in the instance and remove it. Then it tells the transaction window to “Accept and hide” while the blade re-generates and re-populates itself from the updated information in the game instance. It also applies those upgrades to the ship in the hangar so that the ship statistics window can properly display the correct ship statistics. Finally, it tells the main salvage and fitting menu to refresh all the other blades as well so that they are all in sync with the current state of the inventory.
That’s basically it! There are other functions that get called when items are selected that find all the relevant data and populate data fields with it, and there is going to be more added to the logic behind how everything is costed when upgrading, but this gives a general overview of how the menus work. Thank you so much to anyone who actually reads this far!


